BeyondTrust Password Safe

 BeyondTrust Password Safe is an enterprise solution for privileged account, credential, and secrets management. It automates password rotation, enforces strong security policies, monitors and audits privileged sessions, and manages access for human and machine identities across traditional, cloud, and DevOps environments. BeyondTrust Password Safe is an enterprise solution for privileged account, credential, and secrets management. It automates password rotation, enforces strong security policies, monitors and audits privileged sessions, and manages access for human and machine identities across traditional, cloud, and DevOps environments.Versions: 8.0.0 P10 |
Introduction
BeyondTrust Password Safe is an enterprise-grade privileged access management (PAM) solution designed to secure, manage, and audit privileged credentials and access.
The BeyondTrust Password Safe Plugin uses the BeyondTrust API (v3) to support the automated credential retrieval. The credential will be used for collectors and connectors and will be discarded after use. There will be no caching of credentials, allowing the PAM to rotate the password if the policy defines so. Every run will get the latest password.
Prerequisites
Before you begin, ensure you have the following:
- Administrative access to your BeyondTrust Password Safe instance.
- A list of managed accounts that will be accessed by RSA G&L.
- The IP address or CIDR range of the RSA G&L instance for API access rules.
Application Setup
This section provides step-by-step instructions to configure BeyondTrust Password Safe Cloud for OAuth-based API access. Following this setup, RSA G&L can authenticate as a service account, create an automated access request, and retrieve stored passwords for use with the PAM plugin for collectors and connectors.
The application setup section is provided for reference purposes only. You must contact your BeyondTrust SME to optimally and securely setup the BeyondTrust Password Safe to work with RSA G&L.
Step 1: Create a User Group and Smart Group
First, create a user group and a smart group to manage access for RSA G&L.
-
Create a User Group:
- Navigate to Configuration > Role Based Access > User Management.
- Click the Groups tab and select Create New Group > Create a New Group.
- Enter
API Accessas the Group Name, provide a Description, and click Create Group.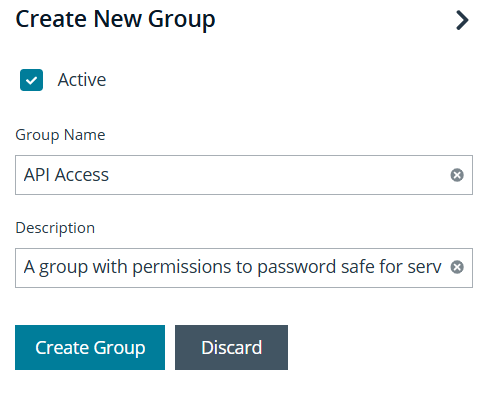
-
Create a Smart Group:
- Navigate to Managed Accounts.
- Select the accounts RSA G&L will access.
- Click Add to Smart Group.
- In the Add To Manual Smart Group dialog, enter
G&Lin the Smart Group (manual) field. - Click Add As New Option.
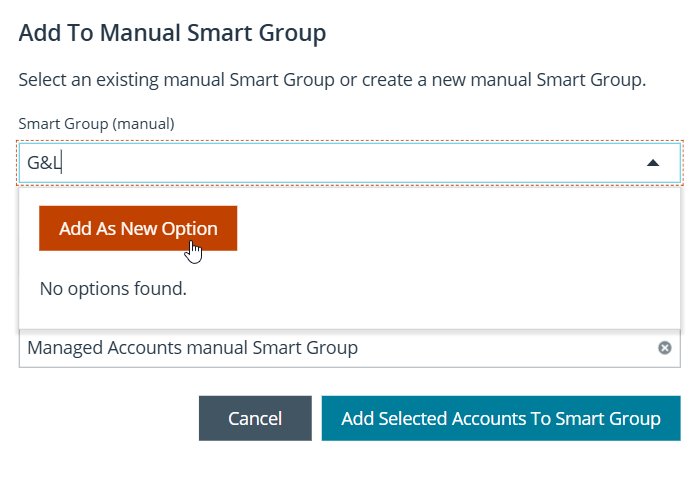
- Set Category to Managed Accounts, provide an optional Description, and click Add Selected Accounts To Smart Group.
Step 2: Configure API Access and Permissions
Next, configure API access policies and assign permissions to the user group.
-
Configure API Access Policy:
- Go to Configuration > General > API Registrations.
- Click Create API Registration and select API Access Policy.
- Fill in the registration details, including the Access Token Duration.
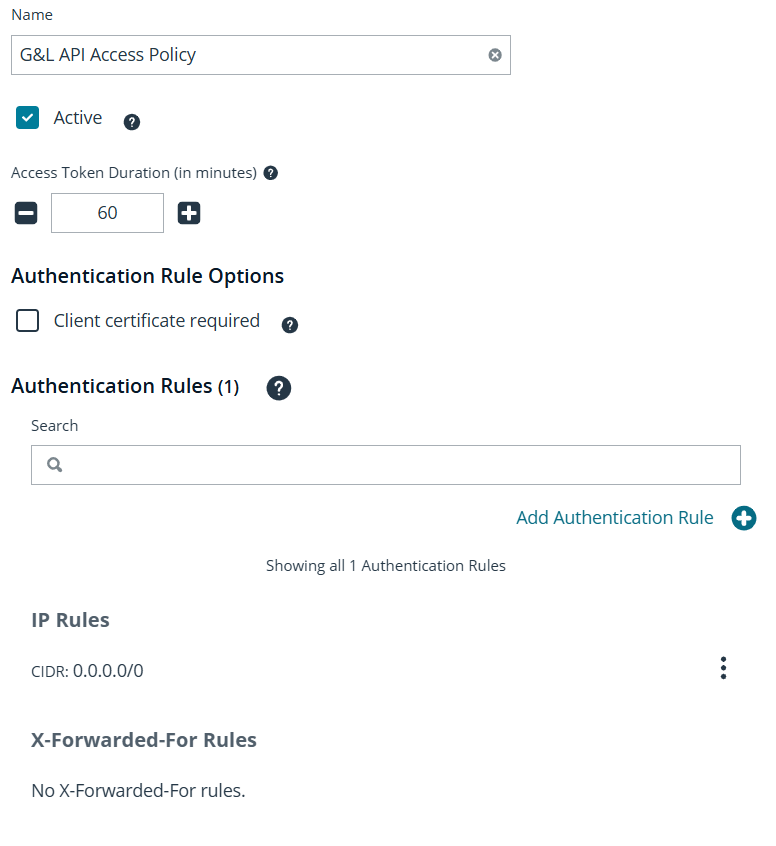
- Click Add Authentication Rule, select CIDR and IP Rule, and add the appropriate CIDR (e.g.,
0.0.0.0/0for initial testing). - Click Create Rule.
-
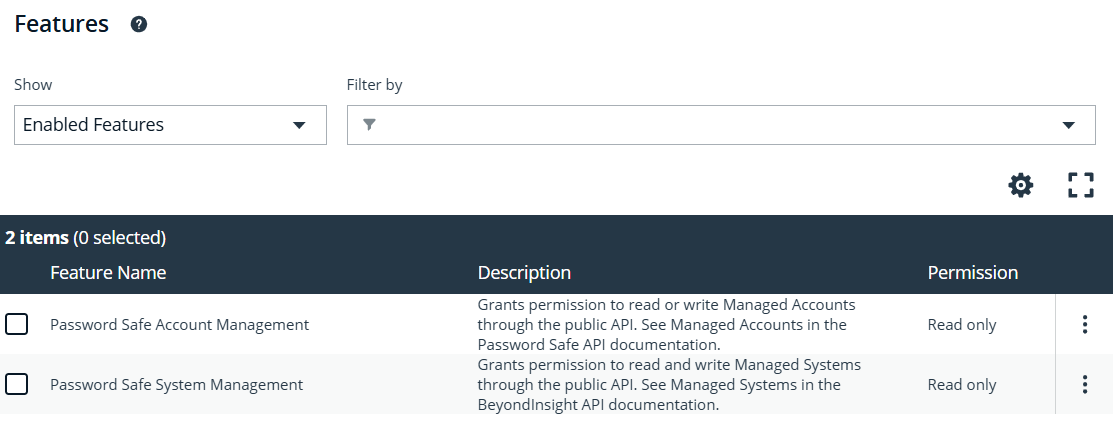
Assign Permissions and Features:
- Go to the
API Accessgroup details and select the Features tab. - Select All Features, search for and select Password Safe Account Management and Password Safe System Management.
- Click Assign Permissions and grant Read Only access.
- Go to the
Step 3: Create an Access Policy
Create an access policy to govern how credentials are released.
- Go to Configuration > Privileged Access Management Policies > Access Policies.
- Click Create Policy.
- Enter
G&L API Auto Approve Policyfor the Access Policy Name and provide a Description.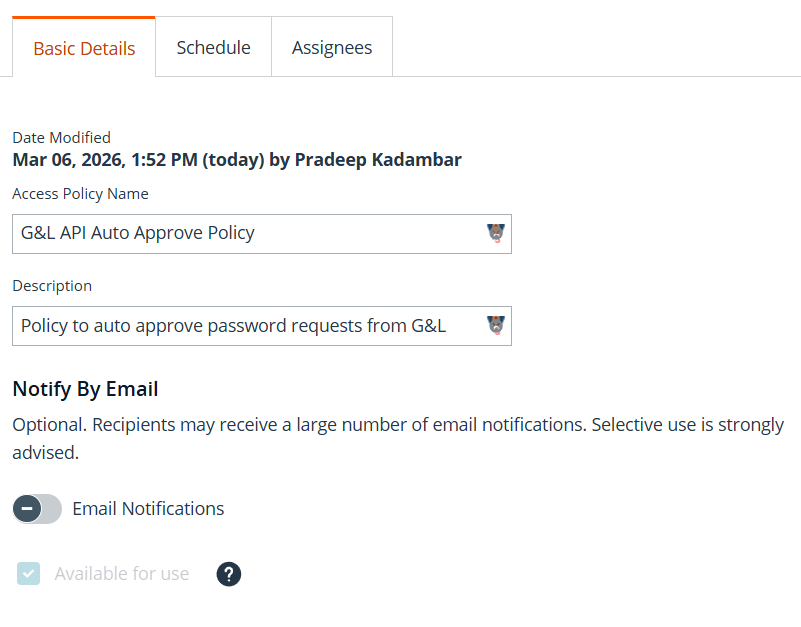
- Click Create Policy.
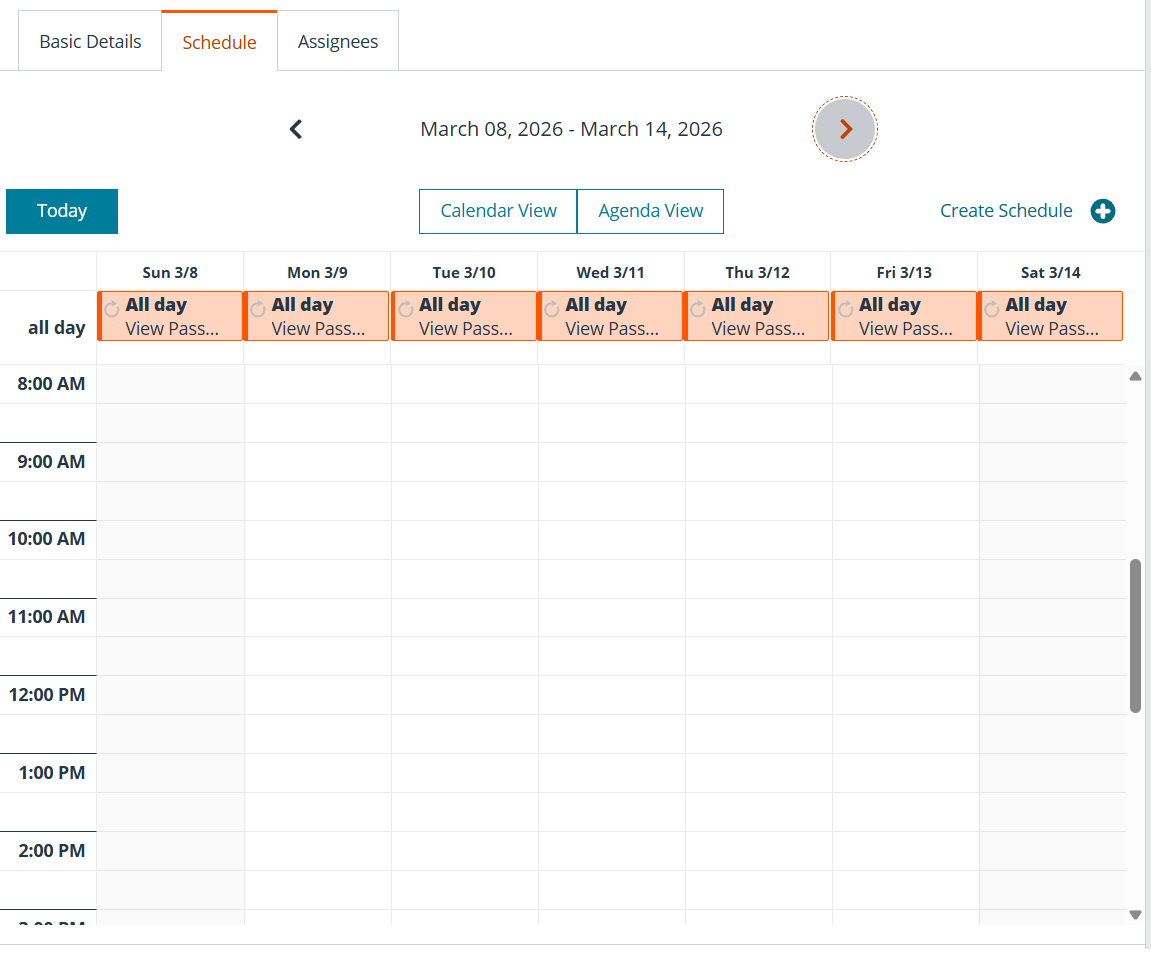
- On the Schedule tab, click Create Schedule.
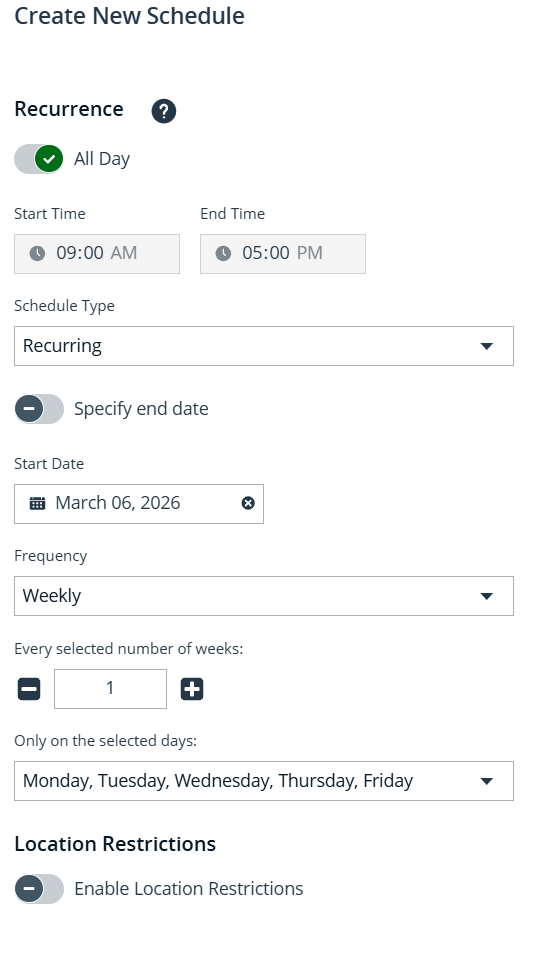
- Enable All Day and verify the Recurrence settings.
- Under Policy Types, select View Password, Auto Approve, and API Only Access.
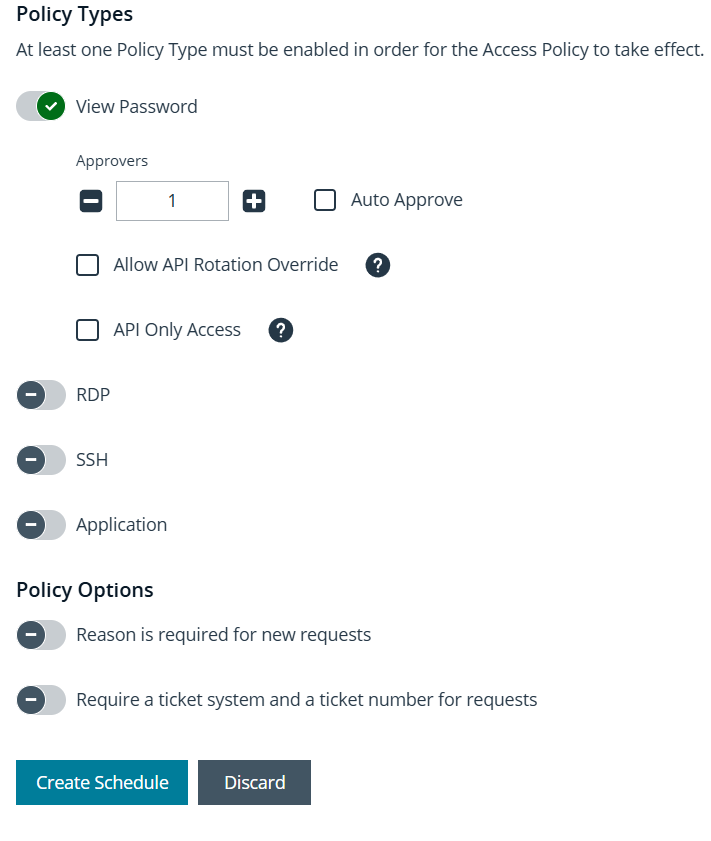
- Click Create Schedule.
Step 4: Assign Smart Group Roles
Assign the Requestor role to the smart group and associate it with the access policy.
- Go to User Management > Groups >
API Access. - Click the Smart Groups tab, find the
G&Lsmart group, and select Edit Password Safe Roles. - Check the Requestor role.
- For Access Policy, select
G&L API Auto Approve Policy.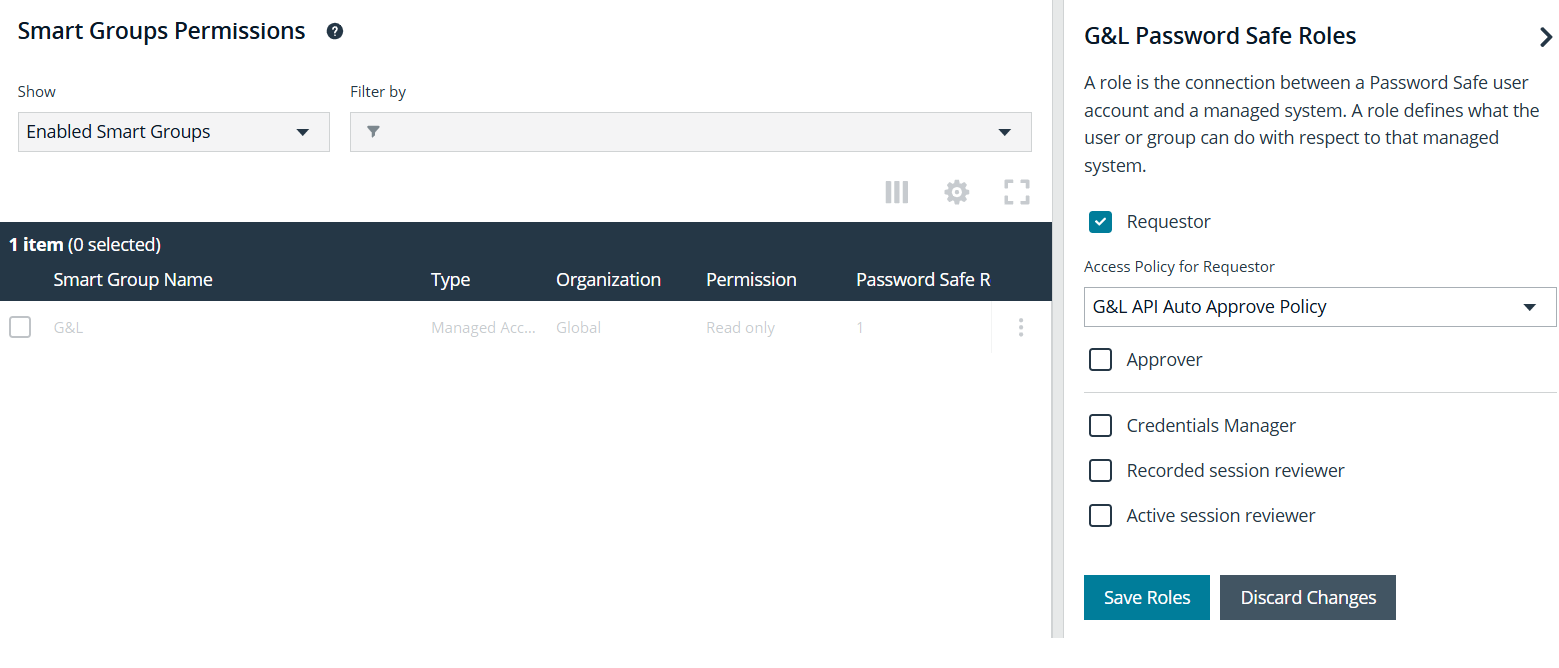
- Click Save Roles.
Step 5: Create and Configure an API User
Finally, create an API user and assign it to the user group.
- Go to Configuration > Role Based Access > User Management.
- Click the Users tab and select Add an Application User.
- Enter
svc_gl_pamfor the Username. - Under API Access Policy, select the policy you created.
- Important: Copy the Client ID and Client Secret for later use.
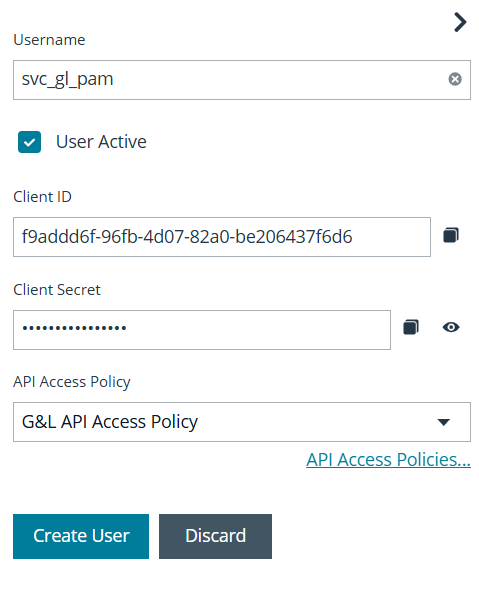
- Click Create User.
- Assign the user to the
API Accessgroup.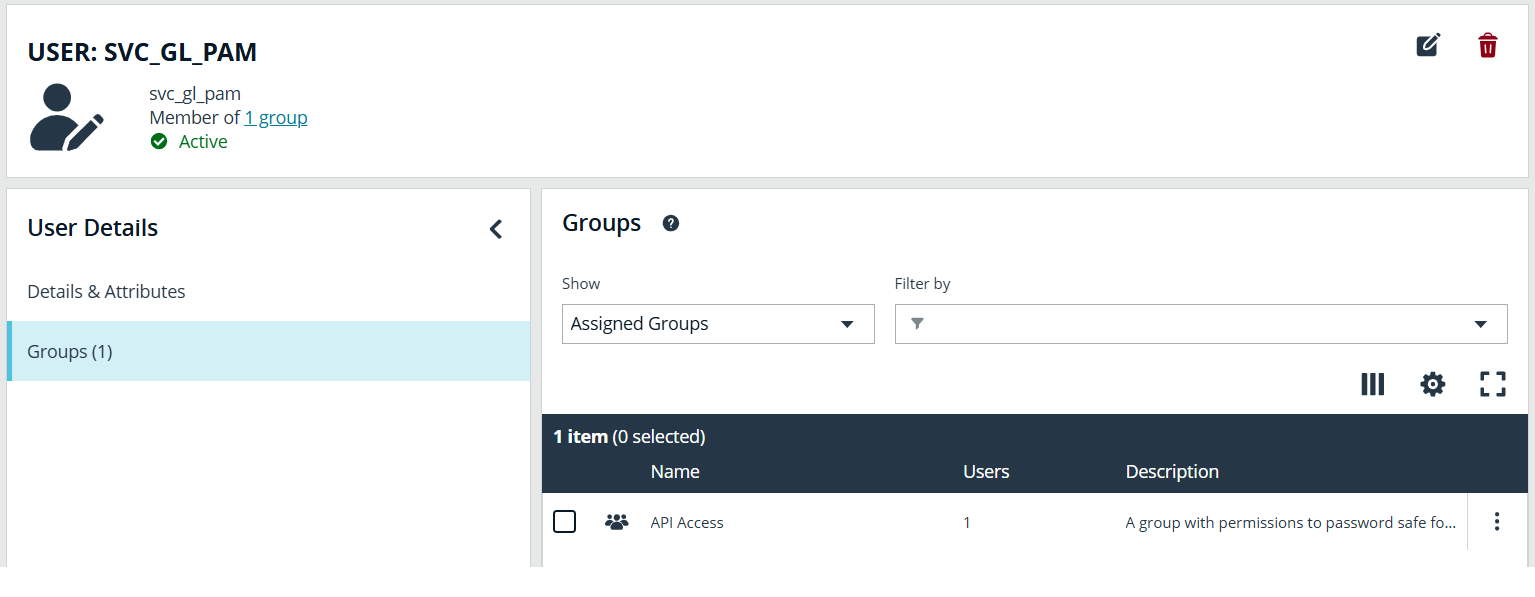
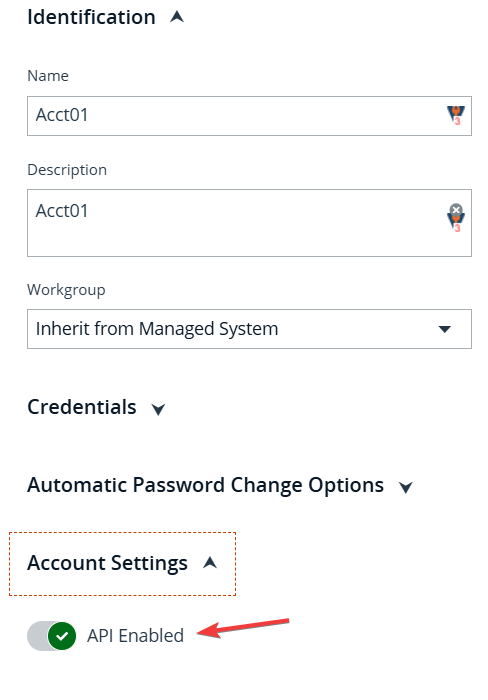
Step 6: Enable API Access on Managed Accounts
Ensure that API access is enabled for the managed accounts you want to access.
- Go to Managed Accounts.
- For each account, ensure Enable API Access is toggled to Yes in the Account Settings.
Troubleshooting
Here are some common issues and their solutions:
- API authentication errors:
- Verify that the Client ID and Client Secret are correct.
- Ensure the API user is assigned to the correct user group.
- Check that the API access policy is correctly configured with the right IP address or CIDR range.
- Unable to retrieve passwords:
- Confirm that the
Requestorrole is assigned to the smart group. - Verify that the access policy is correctly configured to auto-approve requests.
- Ensure that API access is enabled on the managed accounts.
- Confirm that the
- Access denied errors:
- Check that the user group has the necessary
Read Onlypermissions for Password Safe Account Management and Password Safe System Management.
- Check that the user group has the necessary